11.Install the print head, connect the cable, check the damper
Step 1: Power off the printer and remove the carriage cover
Refer to the following video:
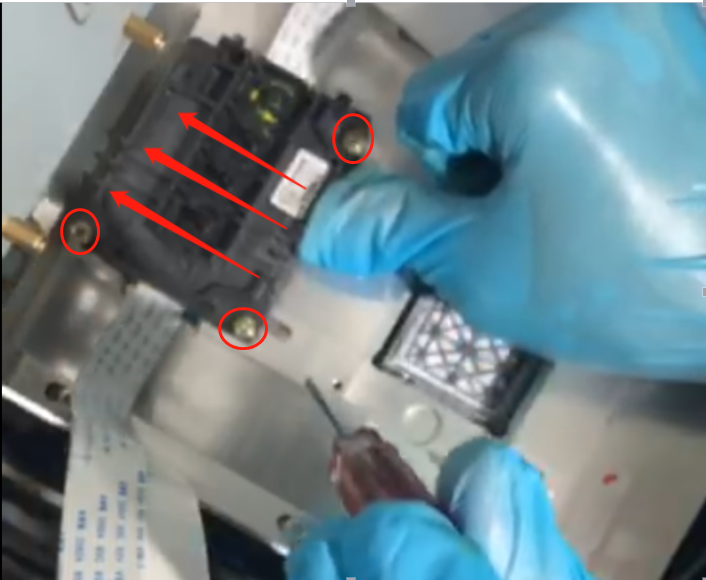
Step 2: Print heads installation
Refer to the following video:
Put the print head steadily to the left and back, close to the bottom plate, and install and fix it.
(Note: Do not fix the print head mounting screws too hard)

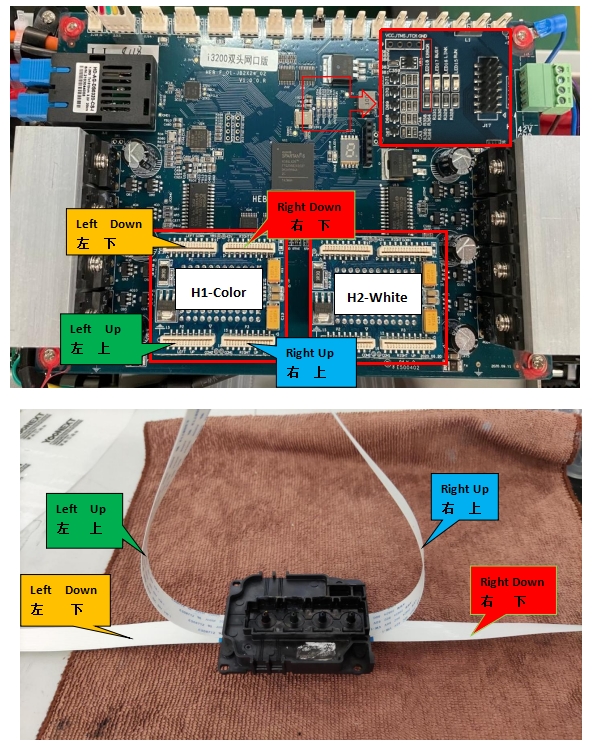
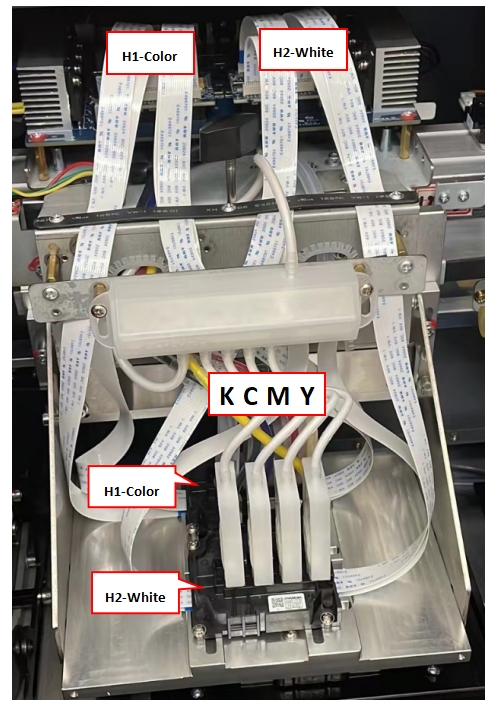
Step 3: Connect the print head cables to the headboard and install dampers
Refer to the following video:
Note the order of print head cables and the order of dampers


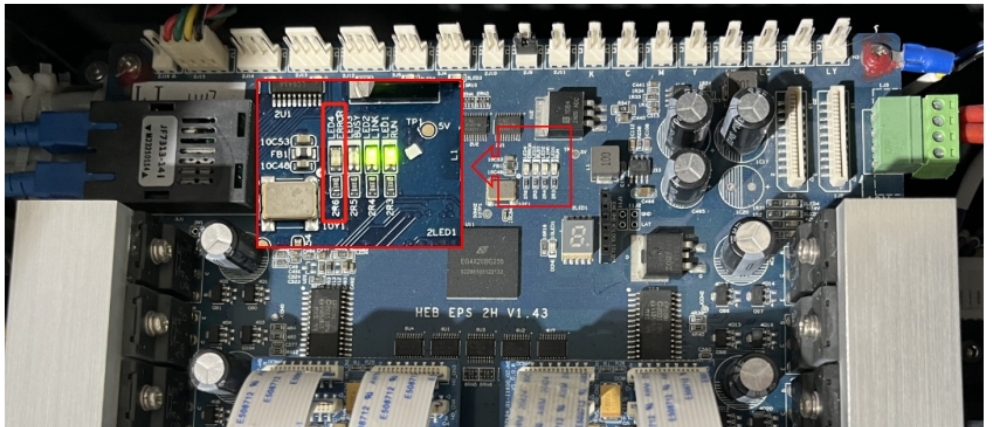
After confirming that the print head data line is connected correctly, turn it on, and observe whether the "ERROR" light on the car board is on. If the light is on, it is abnormal. Turn it off immediately and check.

Add: No.6-2, Jinhua Zhong Road,Zhongshan
Tel: 86-760-88667090
Fax: 86-760-88667096
E-mail: betty@titanjet.com.cn
vivian@titanjet.com.cn
market2@titanjet.com.cn
market3@titanjet.com.cn